Top 10 Ways to Choose Highway and Rural Road Street Lights?

Time:2026-09-16 Author:Sienna
0%

How to choose street lights for highways and rural roads requires more than comparing wattage or purchase prices. These routes face different risks, traffic patterns, weather conditions, and maintenance challenges. A highway may need continuous, uniform illumination near interchanges. A rural road may need focused lighting at bends, crossings, bridges, and village entrances.

Dr. John E. Bullough, a respected roadway-lighting researcher, offers a valuable principle: “Good roadway lighting is not simply about adding more light; it is about placing the right light where it improves visibility.” That idea shapes this guide. It directs attention toward beam distribution, glare control, color quality, pole spacing, energy use, and long-term reliability.

Small details matter. Wet asphalt can reflect poorly aimed light into a driver’s eyes. Tall vegetation can hide a low-mounted fixture within months. Dust, insects, and winter salt can reduce optical performance. Rural maintenance teams may also face long travel distances and limited repair access. These conditions should influence every specification.

The following ten methods examine real selection decisions, from photometric calculations to smart controls and corrosion resistance. Some recommendations will fit most projects. Others require adjustment. There is no universal fixture.

That is the uncomfortable part.

A bright lamp can still create dark gaps. A cheaper system can become expensive after repeated repairs. Careful field assessment remains essential, especially where pedestrian movement, wildlife, fog, or sharp elevation changes complicate visibility.
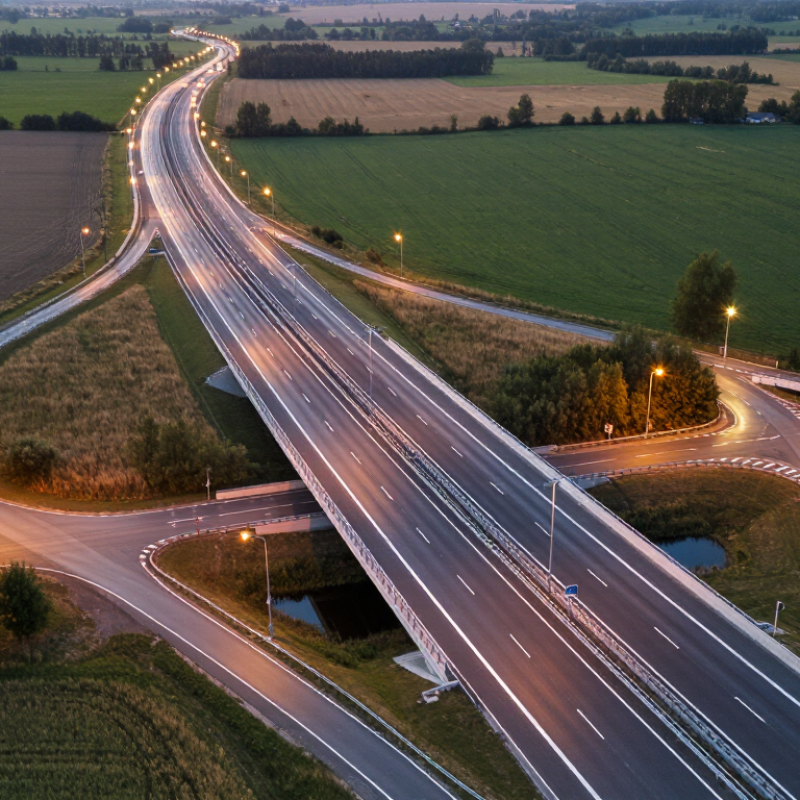
Top 10 Ways to Choose Highway and Rural Road Street Lights?

Define Road Lighting Needs by Traffic, Terrain, and Safety Conditions

Choosing highway and rural road street lights begins with observed road use, not fixture appearance. Record traffic volume, vehicle speed, heavy trucks, cyclists, pedestrians, and seasonal changes. A quiet road at noon may become hazardous after harvest traffic or evening events. Use counts from several periods, not one convenient survey.

Terrain changes lighting needs quickly. Curves, steep grades, bridges, intersections, and tree-lined shoulders can hide people and vehicles. Map these conflict points before selecting pole spacing or optical distribution.

Wet pavement needs controlled glare and consistent illumination, because bright patches can leave darker gaps. In open farmland, wind exposure and soil stability also affect foundation design. Near villages, warmer, lower-intensity lighting may protect comfort while preserving visibility.

Safety decisions should connect illumination levels with stopping distance, sight distance, and maintenance access. Choose durable housings, sealed connections, and controls that support scheduled inspections. Check performance after installation. Measure actual light on the pavement, inspect glare from driver height, and review crash or complaint data. My early designs sometimes prioritized energy savings too heavily. That was a useful mistake. Lower power is not safer if pedestrians disappear beside a dark shoulder. Reassess settings after weather, traffic, and vegetation change.

Assess Luminaire Performance, Brightness, and Light Distribution

Choosing highway and rural road street lights starts with measurable luminaire performance, not appearance. Review tested efficacy, rated life, thermal management, and optical stability. A fitting that produces high initial output may lose brightness after years of heat, dust, and moisture. Small errors matter. Ask for photometric reports from accredited laboratories, including lumen maintenance data and operating temperature ranges.

Brightness must match the road, not simply maximize light. Excessive output can create glare, dark adaptation problems, and wasted energy. Check average illuminance, uniformity, and threshold increment for the actual road layout. Curves, junctions, pedestrian crossings, and narrow shoulders need different attention. Measure, do not guess. A light meter survey can reveal dark patches that a computer model misses.

Light distribution is equally important. Use the optical pattern that places light along the carriageway and shoulder without spilling heavily into homes or nearby fields. Review the photometric file with mounting height, pole spacing, tilt, and road width included. Shielding may improve comfort, although it can reduce useful brightness if poorly selected. Rural installations often face uneven terrain and changing vegetation. That complicates predictions. A practical trial section can expose installation problems before full deployment. Even careful calculations contain assumptions, so compare them with nighttime observations and revise the design when evidence disagrees.

Top 10 Ways to Choose Highway and Rural Road Street Lights: Assess Luminaire Performance, Brightness, and Light Distribution
No. Selection Factor Recommended Performance Dimension What to Assess Practical Verification
1 Define the required brightness level Use roadway luminance in cd/m² for motor-traffic roads, or horizontal illuminance in lux where luminance design is not applicable. Typical road-lighting projects may use approximately 0.3–2.0 cd/m² or 5–30 lux, depending on traffic, speed, conflict areas, and surroundings. Higher brightness is not automatically safer. Excessive light can increase glare, energy use, and contrast problems. The required level should be established by the applicable national or municipal road-lighting standard. Request a lighting calculation showing maintained luminance or illuminance, not only initial lamp output.
2 Check uniformity of illumination Look for maintained overall uniformity values commonly around Uo ≥ 0.40 for many traffic-road applications; exact limits vary by road classification. Uniform lighting reduces dark patches and helps drivers identify pedestrians, obstacles, curves, and changes in road surface conditions. Review a point-by-point grid calculation for the carriageway, including minimum, average, and maximum values.
3 Evaluate light distribution Select an optical distribution suited to the road width, pole height, mounting arrangement, lane layout, and spacing. Common distributions include short, medium, long, asymmetric, and forward-throw patterns. The correct beam pattern places light on the pavement instead of wasting it behind the pole, outside the road boundary, or into nearby properties. Compare photometric files, such as IES or LDT files, with the actual pole spacing, mounting height, outreach, and road geometry.
4 Control glare for driver comfort Assess threshold increment, glare rating, shielding, optical cutoff, and upward light output. Many roadway designs target a threshold increment of approximately 10% or lower, subject to the governing standard. Glare can reduce visual comfort and make it harder to detect hazards, especially on unlit rural backgrounds or wet pavement. Check the luminaire's glare data and confirm that the calculation includes driver viewing directions and approaching traffic lanes.
5 Compare optical efficiency and useful output For modern LED roadway luminaires, system efficacy commonly falls within approximately 120–180 lm/W, depending on drive current, optics, temperature, and control equipment. Evaluate delivered lumens and road-lighting performance rather than relying only on LED chip efficacy or total wattage. Use tested system wattage, delivered lumens, power factor, and photometric performance from an independent laboratory report.
6 Choose an appropriate color temperature A correlated color temperature of approximately 2700–4000 K is commonly considered suitable for outdoor roads. Lower values generally produce warmer light and less short-wavelength emission. Warmer light can reduce visual intrusion into rural surroundings and may be preferred near residences, wildlife areas, and environmentally sensitive locations. Higher CCT can provide a whiter appearance but should not be selected solely for perceived brightness. Specify CCT tolerance, color consistency, local environmental requirements, and any restrictions near protected habitats or observatories.
7 Verify color rendering and visibility A general color-rendering index of Ra/CRI ≥ 70 is widely used for roadway lighting, while higher values may be selected near intersections, pedestrian areas, or security-sensitive locations. Color rendering affects the recognition of vehicles, signs, clothing, road markings, and roadside hazards. It should be balanced with efficacy, lifetime, and glare performance. Review CRI, R9 where relevant, chromaticity tolerance, and measured color data for the complete luminaire.
8 Assess lifetime and lumen maintenance Specify an LED lifetime such as L70 ≥ 100,000 hours when supported by the thermal design and operating conditions. The maintenance factor is often modeled near 0.80, but the project value must be calculated. A long rated life does not guarantee long field performance. Driver reliability, ambient temperature, operating current, heat dissipation, dirt accumulation, and switching cycles also affect maintenance needs. Request LM-80/TM-21-related evidence where applicable, in-situ temperature data, driver lifetime information, and a complete maintenance-factor calculation.
9 Check outdoor durability and electrical protection For exposed highway and rural installations, IP66 is commonly specified for dust and water protection, with IK08 or higher impact protection often selected according to local vandalism and weather risks. The enclosure, lens, seals, coating, connectors, and mounting hardware must withstand rain, dust, vibration, salt, insects, temperature changes, and maintenance activity. Review IP and IK test reports, corrosion-resistance details, operating-temperature range, wind-load data, and surge protection such as 6 kV or 10 kV as required by the project.
10 Confirm installation compatibility and controls Verify mounting diameters, tilt adjustment, pole-top or side-entry compatibility, dimming capability, photocell or network controls, and operating schedules. A luminaire performs correctly only when installed at the design height, angle, spacing, and orientation. Dimming and adaptive controls can reduce energy consumption while maintaining required light levels. Obtain a complete design with pole geometry, spacing, aiming angle, control profile, energy estimate, and commissioning requirements.

Compare Energy Efficiency, Controls, and Long-Term Operating Costs

Top 10 Ways to Choose Highway and Rural Road Street Lights

Choosing highway and rural road street lights requires more than comparing fixture wattage. Field audits often show that poor optics create dark shoulders, even when total brightness looks impressive. Review maintained lumens, beam distribution, glare control, and uniformity across lanes. A lower-wattage fixture is not automatically cheaper. That difference matters.

Calculate energy use from actual operating hours, local electricity rates, and seasonal schedules. Efficient LEDs can reduce consumption, but their drivers, heat management, and replacement intervals affect long-term value. Request tested performance data, not only laboratory claims. Check whether output remains stable after years of dust, moisture, and temperature changes. Rural equipment faces rough conditions.

Controls deserve equal attention. Astronomical clocks can adjust lighting without daily manual visits, while dimming profiles may reduce overnight consumption. Motion detection can work on quiet access roads, but poorly adjusted sensors may create sudden dark zones. Networked controls provide fault alerts, yet communication fees and software support can increase operating costs. Include installation, inspections, cleaning, repairs, and disposal in a ten-year cost model. I would also test a small road section before full deployment. A pilot can expose glare, delayed switching, or weak wireless coverage that specifications miss. Our assumptions are often too optimistic.

Top 10 Ways to Choose Highway and Rural Road Street Lights

Compare energy efficiency, control strategies, and long-term operating costs using representative system values for a 12-hour nightly operating schedule.

Planning assumptions: 365 operating days per year, electricity at $0.15 per kWh, and representative system power of 150 W for high-pressure sodium, 100 W for full-power LED, 70 W average for scheduled LED dimming, and 60 W average for adaptive LED dimming. Ten-year operating cost includes energy and estimated routine relamping or maintenance allowances; installation, civil works, financing, and disposal are excluded.

LED systems reduce energy use compared with conventional high-pressure sodium lighting, while scheduled or adaptive dimming can reduce consumption further during low-traffic hours. When selecting a system, evaluate roadway illumination, optical distribution, uniformity, glare control, dimming capability, photocell accuracy, sensor reliability, maintenance access, environmental durability, and total ownership cost.

Check Durability Against Weather, Vibration, and Rural Road Conditions

Top 10 Ways to Choose Highway and Rural Road Street Lights

Choosing highway and rural road street lights requires more than comparing brightness, wattage, or purchase price. Field inspections show that weather and vibration often cause earlier failures than expected. Look for sealed housings with an appropriate IP rating against rain, dust, and mud. High UV exposure can damage plastic lenses and cable insulation. Strong wind also demands a tested mounting structure. Aluminum housings with effective corrosion protection usually perform better near wet farmland or salted roads. Check thermal cycling, operating temperature, and surge protection. Ask for test reports, not only catalogue claims.

Rural roads create unusual vibration. Gravel, potholes, farm machinery, and heavy trucks can loosen brackets and internal connections. Choose reinforced poles, secure fasteners, and impact-resistant lenses with a suitable IK rating. Examine the driver, wiring, and battery enclosure carefully. A reliable supplier should provide fatigue testing, vibration results, maintenance guidance, and clear warranty conditions. Standards help, but installation quality still matters. Poorly tightened bolts can defeat a strong design.

Tips: Inspect a sample after simulated rain, dust, and vibration. Check water marks inside the housing. Review five-year maintenance costs, not just the initial quote. Ask whether replacement parts remain available. A perfect laboratory result may still disappoint on a rough country road. That possibility deserves honest testing.

Verify Installation Standards, Maintenance Access, and Total Value

Choosing highway and rural road street lights requires more than comparing wattage and purchase prices. Verify the applicable road-lighting standards, electrical rules, and local authority requirements before reviewing products. Check illumination levels, uniformity, glare control, pole strength, grounding, and protection against dust and water. Ask for test reports from recognized laboratories, not only supplier brochures. A real project file should include drawings, photometric data, installation procedures, and inspection records.

Maintenance access deserves equal attention. Inspect whether technicians can safely reach the control gear, connectors, and surge protection. A removable cover, clear working space, and accessible handhole can reduce roadside closure time. Check the lifting method for tall poles. Confirm that replacement parts remain available for several years. Small details matter. Mud around a rural pole base can hide drainage problems. A sealed housing may still fail if cable entries are poorly fitted.

Evaluate total value across the entire service period, not just the initial invoice. Include energy use, traffic management, cleaning, inspections, component replacement, and disposal costs. Compare realistic operating hours and local electricity rates. A lower-priced fitting may create higher costs through frequent failures or difficult access. Request a maintenance schedule with measurable response times. It should also explain warranty limits and performance testing. My field experience suggests that assumptions often fail after installation. Dark winter roads, unexpected tree growth, and weak foundations can change results. Leave room for review after the first season, then adjust aiming, controls, or maintenance intervals when evidence supports it.

FAQS

What should be measured when selecting road lighting?

Review tested efficacy, rated life, thermal management, and optical stability. Request photometric reports from accredited laboratories. Check lumen maintenance and operating temperature data. Appearance alone proves little.

How bright should highway and rural road lighting be?

Brightness should match the road layout, not simply maximize output. Check average illuminance, uniformity, glare, and threshold increment. Excessive brightness can waste energy and disturb dark adaptation.

Why is light distribution important?

Good optics place light along the carriageway and shoulder. They limit spill toward homes and nearby fields. Review mounting height, pole spacing, tilt, and road width together.

Can computer lighting models be trusted completely?

No model is perfect. Uneven ground and growing vegetation can change results. A light meter survey may reveal dark patches. Nighttime observations should challenge the design.

What areas need special lighting attention?

Curves, junctions, pedestrian crossings, and narrow shoulders need separate review. Their risks differ from straight road sections. A trial section can expose problems early.

Which installation standards should be verified?

Check road-lighting standards, electrical rules, and local authority requirements. Review illumination, uniformity, glare control, pole strength, grounding, and dust protection. Ask for recognized laboratory reports.

How can maintenance access affect long-term performance?

Technicians should safely reach control gear, connectors, and surge protection. Clear working space and accessible handholes can shorten roadside closures. Check lifting methods for tall poles. Mud can hide drainage failures.

How should the total value of a lighting system be calculated?

Include energy, traffic management, cleaning, inspections, repairs, and disposal. Compare realistic operating hours with local electricity rates. A cheaper fitting may cost more after repeated failures. Review performance after the first season. Adjust aiming or maintenance intervals when evidence supports it.

Conclusion

Choosing the right lighting system begins with understanding how the road is used. How to choose street lights for highways and rural roads depends on traffic volume, vehicle speed, road width, intersections, pedestrian activity, terrain, and local safety concerns. Select luminaires that provide suitable brightness, uniform coverage, controlled glare, and an appropriate distribution pattern for curves, slopes, junctions, and open rural areas. The goal is clear visibility without creating distracting or excessive light.

Energy performance should also be evaluated through LED efficiency, dimming schedules, adaptive controls, and estimated lifetime operating costs. Fixtures must withstand rain, dust, temperature changes, wind, vibration, and occasional impacts common on rural roads. Before making a decision, confirm compliance with applicable installation standards, ensure poles and electrical systems can be safely maintained, and consider access for cleaning, inspection, repairs, and future upgrades. A reliable choice balances lighting quality, durability, safety, installation requirements, maintenance convenience, and total value over the entire service life.

Sienna

Sienna

Sienna is a skilled marketing professional with a deep expertise in our company’s core products and services. With a passion for innovation and detail, she plays a pivotal role in crafting insightful blog posts that not only highlight the unique features of our offerings but also provide valuable......